1 / 150Use ← → to flip
Excavation and Trenching
Florida International University excavation and trenching course (long; pick slides for a 30-minute elective).
Slide text
· 146 of 150 slides · by Florida International University
The words on each slide as the author wrote them, read from the file by software so they can be searched. Layout, pictures and tables are not shown here: the slides above and the download are the original.
- Slide 1
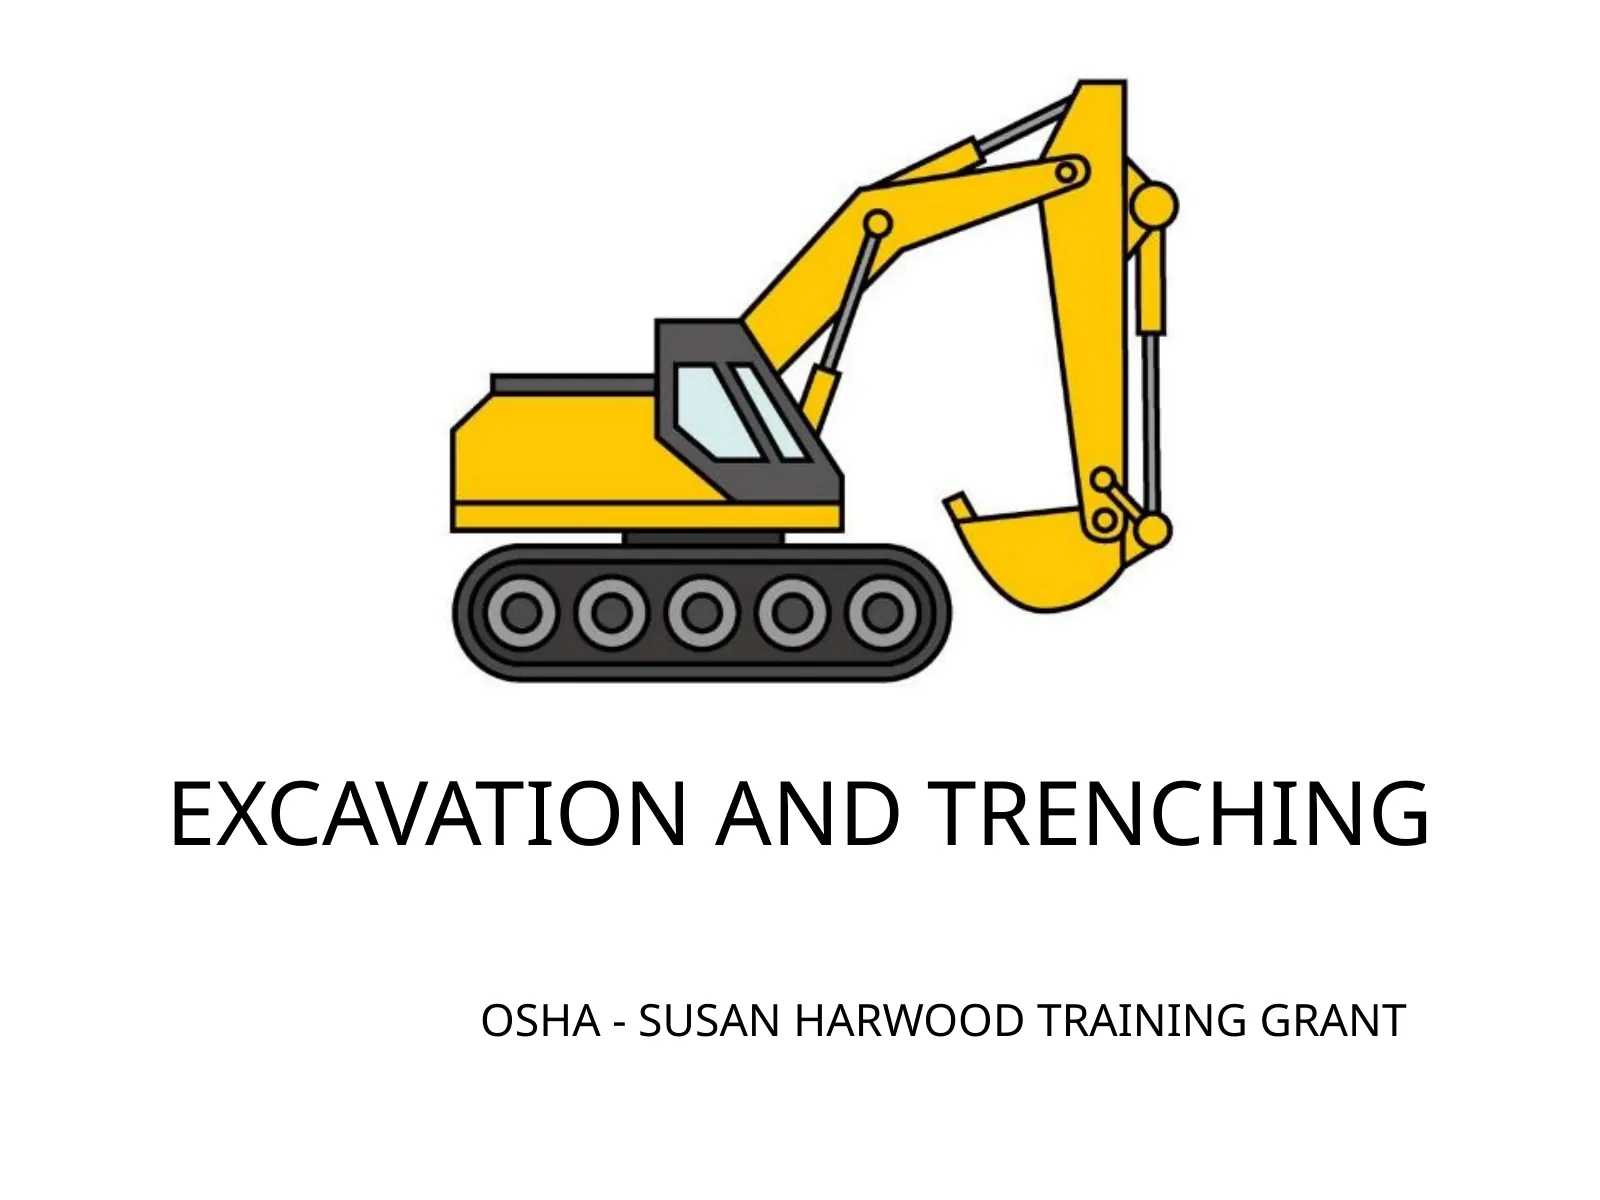
EXCAVATION AND TRENCHING
- OSHA - SUSAN HARWOOD TRAINING GRANT
- Slide 2
WELCOME
- Please sign the attendance sheet
- Take one handout
- Answer the pre-test
- Slide 3
LOCATION
- Emergency Exits
- Emergency Stairs
- Location of restrooms
- Location of water fountains
- Slide 4
DISCLAIMER
- This material was produced under grant number SH-16582-SH7 (2007) from the Occupational Safety and Health Administration, U.S. Department of Labor. It does not necessarily reflect the views or policies of the U. S. Department of Labor, nor does mention of trade names, commercial products, or organizations imply endorsement by the U. S. Government.
- Revisions were made to this material under grant number SH-05120-SH9 from the Occupational Safety and Health Administration, U.S. Department of Labor.
- Slide 5
AGENDA
- Welcome
- Introduction to OSHA
- Worker’s rights
- Introduction to Trenching and Excavation Hazards
- What is trenching?
- Preventing excavation hazard
- Common Trenching and Excavation Hazards
- Soil Classifications
- Exercises
- Certificates
- Slide 6
INTRODUCTION
- TO
- OSHA
- Overview of anti-retaliation provisions, employee rights, employer responsibilities, whistleblower laws, and OSHA’s complaint investigation procedures
- Slide 7
WHY IS OSHA IMPORTANT TO YOU?
- OSHA began because, until 1970, there were no national laws for safety and health hazards.
- On average, 14 workers die every day from job injuries
- Worker deaths in America are down–on average, from about 38 worker deaths a day in 1970 to 14 a day in 2017
- WORKER FATALITIES
- 5,147 workers died at the job in 2017, 971(20.7%) worked in construction
- Excavation — an average of 19 death per year, from a low of 10 death in 2014 to a high of 33 death in 2016
- (Source: BLS 2018)
- Slide 8
DISCUSSION QUESTIONS
- When, during your work experience, did you first hear about OSHA?
- What did you think about OSHA then?
- What do you think OSHA’s job is?
- Slide 9
HISTORY OF OSHA
- OSHA stands for the Occupational Safety and Health Administration, an agency of the U.S. Department of Labor
- OSHA’s responsibility is worker safety and health protection
- On December 29, 1970, President Nixon signed the OSH Act
- This Act created OSHA, the agency, which formally came into being on April 28, 1971
- Slide 10
OSHA’S MISSION
- To save lives
- To prevent injuries
- To protect
- America’s workers
- Slide 11
STRATEGIES TO REDUCE INJURIES AND DEATHS
- Strong, fair, and effective enforcement.
- Outreach, education, and compliance assistance.
- Partnerships and other cooperative programs.
- Slide 12
HCS PICTOGRAMS AND HAZARDS
- Labels for hazardous substances in your workplace
- Slide 13
OSHA INSPECTIONS
- The OSH Act authorizes OSHA compliance safety and health officers (CSHOs) to conduct workplace inspections at reasonable times.
- OSHA conducts inspections without advance notice, except in rare circumstances (e.g. Imminent Danger)
- In fact, anyone who tells an employer about an OSHA inspection in advance can receive fines and a jail term.
- Slide 14
INSPECTIONS PROCESS
- A typical OSHA on-site inspection includes four stages:
- 1. Presentation of inspector credentials.
- 2. An opening conference.
- 3. An inspection walk-around.
- 4. A closing conference.
- Slide 15
OSHA’S INSPECTION PRIORITIES
- Priority
- 1st
- 2nd
- 3rd
- 4th
- Category of Inspection
- Imminent Danger:
- Reasonable certainty an immediate danger exists
- Fatality/Catastrophe:
- Reported to OSHA; inspected ASAP Complaints/Referrals:
- Worker or worker representative can file a complaint about a safety or health hazard Programmed Inspections:
- Cover industries and employers with high injury and illness rates, specific hazards, or other exposures.
- Slide 16
OSHA’S COMPLAINT INVESTIGATIONS
- OSHA evaluates each complaint to determine how it can be handled best--an off-site investigation or an on-site inspection
- Before beginning an inspection, OSHA staff must be able to determine from the complaint that there are reasonable grounds to believe that a violation of an OSHA standard or a safety or health hazard exists.
- If OSHA has information indicating the employer is aware of the hazard and is correcting it, the agency may not conduct an inspection after obtaining the necessary documentation from the employer.
- Slide 17
CONT.
- Employee may file a complain with OSHA under Section 11(c) if your employer retaliates against you by taking unfavorable personnel action because you engaged in protected activity relating to workplace safety and health.
- OSHA requires that complaints must be filed within 30 days after the alleged retaliation.
- Slide 18
RIGHTS AS A WHISTLEBLOWER
- Your employer may be found to have retaliated against you if your protected activity was a contributing or motivating factor in its decision to take unfavorable personnel action against you. Such actions may include:
- Firing or laying off
- Blacklisting
- Denying overtime or promotion
- Disciplining
- Denying benefits
- Failing to hire or rehire
- Intimidation
- Reassignment affecting promotion prospects
- Reducing pay or hour
- Slide 19
QUESTIONS ABOUT
- OSHA?
- Slide 20
DEFINITIONS
- Excavation
- Any man-made cavity or depression in the earth’s surface (including its walls, floor and lip) formed by earth removal. For rescue purposes an excavation is wider than it is deep.
- Slide 21
DEFINITIONS
- Trench
- A narrow excavation which is deeper than it is wide, with a maximum width of fifteen (15) feet measured at the floor (bottom).
- Slide 22
EXCAVATIONS OVERVIEW / MAIN POINTS
- Excavation laws, regulations, standards
- Soil classification
- Soil testing
- Competent person responsibilities
- Hazards associated with trenches
- Protective systems
- Slide 23
TRAGIC FACTS
- Excavating is recognized as one of the most hazardous construction operations
- 97 Workers were killed on Excavation/Trenching jobs from 2013-2017.
- From a low of 10 deaths in 2014 to a high of 33 in 2016.
- Cave-ins are more likely than other excavation related accidents to result in worker fatalities.
- (Source: BLS 2018, www.osha.gov)
- Slide 24
TRAGIC FACTS
- 60% of related deaths are rescuers
- Civilians
- Fire dept personnel
- Co-workers
- Cave-ins can happen without warning
- All of the fatalities and injuries could have been prevented
- Slide 25
COLLAPSE FORCES
- 24 inches of soil on a person’s chest weighs 750-1000 lb.
- 18 inches of soil covering a body weighs 1800-3000 lb.
- Slide 26
SOIL WEIGHT EXAMPLE
- 20 cubic feet = 2,000 lbs.
- How tall are you? This example is 4ft deep Do you think you can get out?
- © ACR Publications Used By Permission
- Slide 27
COLLAPSE FORCE
- Shear wall collapse speed is 45 mph
- 1 cubic foot of soil can weigh from 100 to 125 lb.
- Slide 28
SPEED OF COLLAPSING DIRT
- Imagine this coming down on top of you….
- Weight of a Volkswagen
- Weight of one cubic yard of soil
- 2,785 Pounds
- 2,700 Pounds
- Slide 29
EFFECTS ON THE BODY
- Respiratory distress
- Crush syndrome
- Total body impact
- Slide 30
TRENCH COLLAPSE
- Slide 31
THE SEVEN TRENCHING HAZARDS
- 1. Cave–ins
- 2. Electric Line Contact
- Overhead
- Buried
- 3. Falls into Excavations
- 4. Equipment Falling into Excavations
- 5. Explosion / Fire / Electrocution
- 6. Hazardous Atmosphere
- 7. Drowning
- Slide 32
UNSAFE ATTITUDES
- “I Know what I’m doing.”
- “It can’t happen to me.”
- “I’ve been doing it that way for years.”
- “I’d sleep in that hole!”
- “Don’t worry, we’ll watch the walls and tell you if you need to get out.”
- Slide 33
MOST COMMON CAUSES OF CAVE-INS:
- Poor Planning
- Misjudgment of soil type.
- Inadequate, or incorrect installation of protective devices.
- Defective protective devices.
- Failure to adjust for changing conditions
- Slide 34
LEGAL ASPECTS
- OSHA [29 CFR 1926.650 - 652]
- Excavation standard applies to all open excavations made in the earth’s surfaces including
- trenches, all
- surface
- encumbrances that would create a hazard, and protective systems
- Slide 35
WHAT’S IN THE STANDARD?
- Scope, application and definitions
- Job Site Hazard Listing
- Requirements for Protective Systems
- Appendixes that detail:
- Soil Classification
- Sloping and Benching
- Timber and Aluminum Hydraulic Shoring
- Protective System Selection Decision Tree
- Slide 36
GENERAL REQUIREMENTS
- 1926.651
- (a) Surface encumbrances
- (b) Underground installations
- (c) Access & egress
- (d) Exposure to vehicle traffic
- (e) Exposure to falling loads
- (f) Warning systems for mobile equipment
- Slide 37
GENERAL REQUIREMENTS ( CONT.)
- 1926.651
- (g) Hazardous atmospheres
- (h) Protection from hazards associated with water accumulation
- (i) Stability of adjacent structures
- (j) Protection from loose rock or soil
- (k) Inspections
- (l) Fall protection
- Slide 38
SURFACE ENCUMBRANCES
- All surfaces encumbrances that are located so as to create a hazard to employees shall be removed or supported as necessary to safeguard employees
- Slide 39
UNDERGROUND INSTALLATIONS
- Utility companies shall be contacted with in established local response times
- Advised of proposed work
- Asked to establish location of utility
- When request cannot be met, employer may proceed with caution with detection equipment of an acceptable means to locate utility
- Slide 40
UNDERGROUND INSTALLATIONS ( CONT.)
- While
- the excavation
- is open, underground installations shall be protected, supported or removed as necessary to safeguard employees
- Slide 41
ACCESS & EGRESS
- Structural ramps
- Used by employees shall be designed by a competent person
- When used for equipment shall be designed competent person qualified in structural design
- Stairway, ladder, ramp or other safe means of egress require no more than 25 ft of lateral travel for employees in excavations that are 4 feet or more in depth
- Ladders must be secured and extend a minimum of 36 inches above the landing
- Slide 42
EXPOSURE TO VEHICLE TRAFFIC
- Employees exposed to public vehicle traffic shall be provided with and wear warning vests or other suitable garments
- Marked or made with reflectorized or highly visible material
- Requiring a designated, trained flag person along with signs, signals, and barricades when necessary
- Slide 43
EXPOSURE TO FALLING LOADS
- No
- employee
- shall
- be permitted
- underneath loads handled by digging or lifting equipment
- Stand away from vehicle being loaded or unloaded to avoid being struck
- Operators may remain in cabs when vehicles are equipped in accordance with 1926.601
- Slide 44
STUCK-IN
- Slide 45
WARNING SYSTEMS FOR MOBILE EQUIPMENT
- When operator does not have clear view of edge of excavation
- Warning system shall be utilized
- Barricades
- Hand or mechanical signals
- Stop logs
- Slide 48
HAZARDOUS ATMOSPHERES
- Testing and controls
- To prevent harmful levels of atmospheric contaminants
- Less than 19.5% or more than 23.5% oxygen
- Atmosphere tested before entry
- Adequate precautions shall be taken
- Ventilation
- Proper respiratory protection
- Testing done often as necessary
- Slide 49
EXPOSED TO HAZARDOUS ATMOSPHERE
- Slide 50
EMPLOYEES EXPOSED TO HAZARDOUS ATMOSPHERE
- Slide 51
MONITORIN
- Slide 52
VENTILATION BLOWERS
- Slide 53
EMERGENCY RESCUE EQUIPMENT
- Rescue equipment
- Breathing equipment
- Safety harness and line or basket stretcher
- Must be readily available
- Must be attended
- Bell-bottom pier holes, deep and confined footing excavation shall wear a harness with a lifeline securely attached to it
- Slide 54
BELL BOTTOM PIER HOLE
- A tubular shaft with a wider bell shaped cross-section at it’s base for support. Created for foundations and footer construction.
- Slide 55
WATER ACCUMULATION
- Slide 56
WATER ACCUMULATION (CONT.)
- Employees shall not work in excavations where there is accumulated water, or where water is accumulating, unless adequate precautions have been taken, to protect employees.
- Must take adequate precautions to protect employees
- Accumulating water
- Varies with each situation
- Removal monitored by competent person
- Run off from heavy rains requires inspection by competent person
- Slide 57
WATER REMOVAL FROM TRENCH
- Slide 58
WATER REMOVAL EQUIPMENT
- Slide 59
STABILITY OF ADJACENT STRUCTURES
- Where stability is endangered by excavation operations
- Support systems such as shoring, bracing or underpinning shall be provided
- Sidewalks, pavement and appurtenant structures shall not be undermined unless support systems are used to protect employees
- Slide 60
NO SUPPORT PROVIDED TO PREVENT
- STRUCTURAL FAILURE
- Slide 62
PROTECTION FROM LOOSE ROCK AND SOIL
- Hazard from falling or rolling from excavation face
- Scaling to remove loose materials
- Installation of protective barricades
- Other means (retaining devices)
- 2 feet from edge of excavation
- Slide 64
WHAT’S GOOD?
- WHAT’S NOT SO GOOD?
- Slide 65
WHO IS COMPETENT PERSON
- One who is capable of identifying existing or predictable hazards in the surroundings which are unsanitary, hazardous or dangerous to employees & who has authorization to take prompt corrective measures
- Slide 66
COMPETENT PERSON
- Has specific training in and be knowledgeable about soil analysis, use of protective systems and the requirements of the standard
- Slide 67
COMPETENT PERSON MUST BE AWARE OF:
- Falling loads or equipment
- Hazardous atmospheres
- Weather conditions and forecast
- Stability of adjacent structures.
- Slide 68
THE COMPETENT PERSON MUST BE AWARE OF:
- Surface and overhead encumbrances
- Underground utilities
- Access and egress
- Vehicular traffic
- Continuation of trade activity
- Slide 69
INSPECTIONS
- Daily and before start of work
- As needed throughout the shift
- After snowstorms, windstorms, thaw, earthquake
- Soil classification
- Any hazard increasing occurrence
- Employees shall be removed until precautions have been taken
- Slide 70
INSPECTIONS ( CONT.)
- When fissures, tension cracks, sloughing undercutting, water seepage, bulging at the bottom
- Change in size, location or placement of the spoil pile
- Indication of movement in adjacent structures
- Slide 71
HAZARD
- Slide 72
TRAINING, KNOWLEDGE AND EXPERIENCE AS DEMONSTRATED
- THROUGH RESPONSIBLE ACTION
- MAKES A PERSON “COMPETENT.”
- Slide 73
FALL PROTECTION
- If walkway provided
- Where employees permitted to cross, guard rails provided where 6 feet or more above lower levels
- Fall protection standard
- Slide 74
REQUIREMENTS OF PROTECTIVE SYSTEMS
- 1926.652
- Employees shall be protected from cave-in by an adequate protective system except;
- Entirely in stable rock
- Less than 5 feet in depth with no indication of cave-in
- Slide 75
NO PROPER PROTECTION
- Slide 76
PROPER SHORING
- Slide 77
DESIGNS USING MANUFACTURERS DATA
- Deviation will only be allowed after manufacturer issues specific written approval
- Written form at the job site during construction
- Slide 78
MATERIALS AND EQUIPMENT
- Free of damage and defects
- Maintain in manner consistent with manufactures data
- Examined by competent person & evaluated for continued use
- Removed from service until approved by registered professional engineer
- Slide 79
TRENCH BOX
- Slide 80
TRENCH BOXES
- Slide 81
INSTALLATION & REMOVAL
- Members securely connected
- Prevent sliding, falling, kick outs
- Other predictable failure
- Members shall not subjected to loads exceeding those which were designed
- Members removed from bottom first
- Back fill with removal of support system
- Slide 82
INSTALLATION & REMOVAL (CONT.)
- Excavate to no greater than 2 feet below – only if system is rated at full depth and there are no indications of a loss of soil from behind or below the support system
- Employees are not permitted to work below other employees unless adequately protected from falling, rolling, sliding material
- Employees are not allowed in shields when installed, removed or moved vertically
- Slide 83
REMOVAL OF TRENCH BOX
- Slide 84
PICTURE OF TRENCH
- Slide 85
PROPER TRENCH BOX
- Slide 86
SHIELD TESTING
- Slide 87
SHIELD TESTING BY COMPETENT PERSON
- Slide 88
WHAT’S GOOD?
- WHAT’S NOT SO GOOD?
- Slide 89
SHIELD USED WITH SLOPING
- Slide 90
HORIZONTAL SHORING DIMENSIONS
- © ACR Publications Used By Permission
- Slide 91
VERTICAL SHORING DIMENSIONS
- © ACR Publications Used By Permission
- Slide 92
PNEUMATIC SYSTEMS
- Slide 93
SHIELD USAGE AND SAFETY
- SHIELDS ARE USED TO PROTECT WORKERS FROM CAVE-INS, NOT TO PROVIDE SUPPORT FOR THE TRENCH.
- Manufacturer’s Data must be present at work site.
- Top of the shield must extend to the top of the trench.
- If used with sloping, top of shield must extend 18 inches above vertical trench walls.
- Shields may be stacked, provided the bottom one is rated for the total depth of the trench.
- The trench may be dug 2 feet lower than the shield bottom, but the shield must be rated for that depth.
- Backfill around the box to prevent lateral movement.
- Slide 94
SOIL CLASSIFICATION
- 1926 SUBPART P APP A
- Cemented soil
- Cohesive soil
- Dry soil
- Fissured
- Granular soil
- Layered system
- Moist soil
- Plastic
- Saturated soil
- Soil classification system
- Stable rock
- Submerged soil
- Unconfined compressive strength
- Wet soil
- Slide 95
SOIL CATEGORY: STABLE ROCK
- Natural solid mineral material that can be excavated with vertical sides and remain intact while exposed. Examples are granite and sandstone.
- Determining whether a deposit is stable rock may be difficult unless it is known whether cracks exist and whether or not the cracks run into or away from the excavation.
- Slide 96
SOIL CLASSIFICATIONS
- Stable rock
- Type A
- Cohesive soils with an unconfined compressive strength of 1.5 tons per square foot [tsf]
- Examples: Clay, silty clay, sandy clay
- Slide 97
SOIL CLASSIFICATIONS (CONT.)
- No soil is type A if;
- Fissured
- Subject to vibration
- Previously disturbed
- Seeping water
- Part of a sloped or layered system of four horizontal to one vertical
- Slide 98
SOIL FISSURING
- Slide 99
TO MUCH WATER?
- Slide 100
WEIGHT AND VIBRATION
- Slide 101
SOIL TYPES
- Type B
- Cohesive soils with an unconfined compressive strength greater than 0.5 tsf but less than 1.5 tsf
- Silt, silt loam, angular gravel
- Soils that are fissured, or subject to vibration
- Slide 102
SOIL CLASSIFICATION
- Type C
- Cohesive soils with a unconfined compressive strength of 0.5 tsf or less.
- Gravel, sand, loamy sand, submerged soil, soil from which water is freely seeping
- Slide 103
SOIL STRENGTH MEASURE UNCONFINED COMPRESSIVE STRENGTH (UCS)
- The amount of pressure in tons per square foot (tsf) required to cause the soil to fail in compression.
- OSHA Soil Classification is based on the UCS of the soil.
- Slide 104
BASIS OF CLASSIFICATION
- The classification of deposits shall be made based on the results of at least one visual and one manual analysis conducted by a competent person
- Slide 105
ACCEPTABLE VISUAL TEST
- Determine qualitative information on site in general
- Soil adjacent to excavation
- Soil forming the sides of the open excavation
- Soil taken as samples from excavated material
- Estimate range of particle sizes
- Slide 106
ACCEPTABLE VISUAL TEST CONT.
- Observe evidence of surface water
- Water seeping from the sides
- Location of the level of the water table
- Sources of vibration that may affect stability
- Evidence of previously disturbed soil
- Slide 107
ACCEPTABLE MANUAL TEST
- Plasticity
- Ribbon and thread test
- Dry strength test
- Thumb penetration test
- Other strength test
- Pocket pentrometer
- Hand-operated shearvane
- Slide 108
FIELD SEDIMENTATION TEST
- Flat bottom container - at least 7 inches high (old olive jar)
- One 1/2 to 2 inches of soil
- Place soil in the glass jar
- 5 inches of water on top of soil
- Slide 109
FIELD SEDIMENTATION TEST (CONT.)
- After 30 seconds granular sand
- After 3 minutes silt type material type material settles at the bottom settles on top of the sand
- Slide 110
CLAY, SAND AND SLIT
- Slide 111
THE RIBBON TEST
- STEP 1
- Mix soil + water to make into plastic mass
- Roll mass into cylindrical shape 1/2 to 3/4 inch diameter
- Lay across palm of hand
- Press between thumb and second joint of index finger
- Slide 112
THE RIBBON TESTS STEP 2
- Pass through thumb
- Squeeze until it takes the shape of a 1/8 to 1/4 inch thick strip
- Allow to hang freely from hand
- Slide 113
THE RIBBON TEST (CONT.)
- Clay loam will barely ribbon and break easily
- Clay = relatively long ribbon 6” to 8” or more
- More clay = longer and stronger ribbon
- Silt has tendency to produce short ribbon with broken appearance
- Slide 114
PENCILING
- If a 2 inch or longer thread can be held without breaking, the soil is cohesive.
- Slide 115
SHEAR VANE / TORVANE
- Measures Soil’s Shear Strength
- Slide 116
SHEAR VANE / TORVANE
- Select fresh clod or block of undisturbed soil from spoil pile
- Cut a smooth surface on the clod
- Insert vanes of device into the soil
- Retract vanes to show foot imprint
- Set indicator at zero device
- firmly
- Hold
- against soil and twist in clockwise manner until soil fails in shear
- Slide 117
POCKET PENETROMETER TEST
- Device is designed to work on saturated clay soil
- Measures unconfined compressive strength of soil
- Twice the value of shear strength of same soil
- Note machine ring
- Slide 118
POCKET PENETROMETER
- Slide 119
POCKET PENETROMETER TEST
- To begin test, remove red protective cap, push ring against body so that low side reads “O”
- Slowly insert piston until engraved mark is level with soil
- Slide 120
POCKET PENETROMETER TEST
- (CONT.)
- Read strength in tons/sq ft using low side of ring (side closest to the piston end). Record reading and repeat step #1.
- For weak soils, use 1” adaptor foot, multiply by 0.0625
- Slide 121
THUMB PENETRATION TEST
- The thumb penetration procedure involves an attempt to press the thumb firmly into the soil in question.
- Slide 122
THUMB PENETRATION TEST (CONT.)
- If the thumb makes an indentation in the soil only with great difficulty, the soil is probably Type A.
- If the thumb penetrates no further then the length of the thumb nail, it is probably Type B soil.
- If the thumb penetrates the full length of the thumb it is Type C soil.
- The thumb test is subjective and is therefore the least accurate of the tests.
- Slide 123
SOIL CLASSIFICATIONS.
- Layered Geological Strata
- where soils are configured in layers
- must be classified on the basis of the weakest soil
- each layer may be classified individually if a more stable layer lies below a less stable layer
- Type C soil rests on top of stable rock
- Slide 124
CLASSIFICATION
- Look for the following conditions
- Particle size
- Primarily fine grained=cohesive material
- Primarily coarse-grained sand or gravel
- Granular material
- Cohesion
- Remains in clumps=cohesive
- Slide 125
SOIL STRENGTH IS DEPENDENT UPON:
- Type of Soil.
- Amount of Moisture in the Soil.
- Whether the Soil Has Been Previously Disturbed.
- Slide 126
IF WATER IS ADDED
- It Brings Additional Weight
- Hydrostatic Pressure
- It Erodes the Trench Wall
- Water movement typically moves soil
- It Can Freeze and Thaw
- Resulting in cracks & false cohesion
- REMOVAL OF GROUND WATER IS CRITICAL
- Slide 127
SOIL COMPONENTS
- Clay:
- Composed of mineral particles less than 0.002 mm in diameter
- Silt:
- Individual mineral fragments that range from 0.002 to 0.05 mm in diameter.
- Sand:
- Individual rock or mineral fragments that range in diameter from 0.05 to 2.0 mm in diameter.
- Gravel:
- Can be either angular or rounded.
- Slide 128
COHESIVE SOIL
- Soil with a high clay content which has cohesive strength.
- It does not crumble.
- It can be excavated with vertical side slopes.
- It is hard to break up when dry.
- It can be molded.
- It exhibits significant cohesion even when submerged.
- Slide 129
GRANULAR SOIL
- Soils that include gravel, sand, silt.
- Very low clay content.
- It has no cohesive strength.
- Some moist granular soils exhibit apparent cohesion.
- It cannot be molded when moist and crumbles easily when dry.
- Slide 130
SOIL MECHANICS
- Toppling occurs when the trench’s vertical face shears along the tension crack line and topples into the excavation
- Slide 131
TOPPLING
- Slide 132
SUBSIDENCE
- Subsidence and bulging occurs when an unsupported excavation can create an unbalanced stress in the soil which causes subsidence at the surface and bulging of the vertical face
- Slide 133
UNSUPPORTED EXCAVATION
- Slide 134
BULGING
- Slide 135
SOIL MECHANIC
- Heaving or squeezing is caused by the downward pressure created by the weight of adjoining soil or equipment
- Can occur even when shoring or shielding has been properly installed
- Slide 136
FORCES ACTING ON A TRENCH
- © ACR Publications Used By Permission
- Slide 137
BOILING
- Boiling is evidenced by an upward water flow into the bottom of the cut
- High water table is one cause
- Boiling produces a quick condition even when trench boxes are used
- Slide 138
TRENCH BOILING
- Slide 139
TRENCH CRACK
- Tension cracks usually form at a horizontal distance of 0.5 to .75 times the depth of the trench
- Tension Crack
- Slide 140
SLIDING
- Sliding or sloughing may occur as a result of tension cracks
- Sliding
- Slide 141
SLOPING AND BENCHING
- 1926 SUBPART P APP B
- Actual slope
- Distress
- Maximum allowable slope
- Short term exposure
- Stable rock
- Type A soil
- Type B soil
- Type C soil
- Slide 142
DESIGN OF SLOPING AND BENCHING
- Allowable configurations and slopes
- Not steeper than 11/2 horizontal to 1 vertical
- Designs using other tabulated data
- Shall be in written form
- Must identify limits of use of the data
- Identify the registered professional engineer who approved
- Slide 143
IMPROPER DESIGN
- Slide 144
IMPROPER SLOPING
- Slide 145
ALLOWABLE SLOPES
- Soil Type
- Height/ Depth
- Slope angle
- Stable Rock
- Vertical
- 90 Degree
- Type A
- ¾ to 1
- 53 Degree
- Type B
- 1 to 1
- 45 Degree
- Type C
- 34 Degree
- Type A Short term
- ½ to 1 height/depth and 63 degree slope
- Max excavation depth 12 ft
- Slide 146
EXAMPLES OF SLOPING FOR DIFFERENT SOILS
- Slide 147
BENCHING
- Only to be used on soil types A and B
- Type A
- Type B
- Slide 148
SOIL TYPE A
- Type A soil
- Supported of shielded vertically sided lower portion
- ¾ to 1
- 20 feet max depth
- Shield 18 inches above to prevent rollover
- Slide 149
SOIL TYPE B
- Type B soil
- Supported of shielded vertically sided lower portion
- 1 to 1 sloped
- 18 inches minimum at top of shield to prevent rollover
- Type B
- Soil Supported of shielded vertically sided lower portion
- Slide 150
SOIL TYPE C
- Type C soil supported of shielded vertically sided lower portion
- 1 ½ to 1
- 20 feet max depth
- 18 inches above to prevent rollover
More on Excavations
pptx
42 slidesExcavations (OSHA 10-Hour Construction Outreach)
OSHA's own 10-hour Construction Outreach deck on trenching and excavation hazards and protective systems (2015 edition).
U.S. Department of Labor, OSHA (with the OTIEC Outreach Workgroup)ArchivedPublic domain
pdf
7 slidesExcavations: Lesson Plan (OSHA 10-Hour Construction Outreach)
Instructor lesson plan with objectives, timing and teaching procedures for the OSHA excavations outreach deck.
U.S. Department of Labor, OSHA (with the OTIEC Outreach Workgroup)ArchivedPublic domain
pdf
1 slidesExcavations: Knowledge Check (OSHA 10-Hour Construction Outreach)
Student knowledge-check quiz that accompanies the OSHA excavations outreach deck.
U.S. Department of Labor, OSHA (with the OTIEC Outreach Workgroup)ArchivedPublic domain